
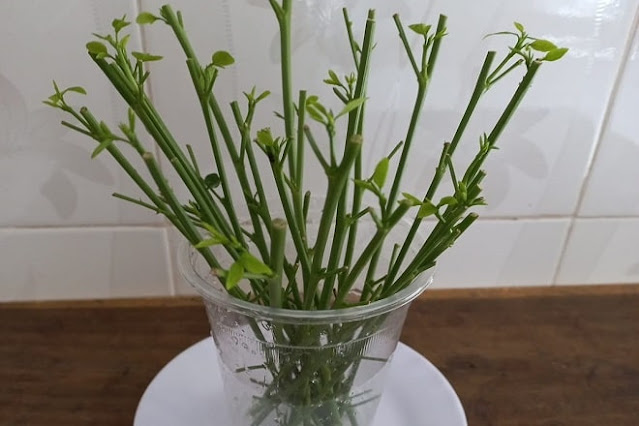
Choose healthy, fresh katuk plants that have had all their leaves stripped and have many nodes. Then, cut segments of about 25 cm at an angle. The best time to plant katuk is in the first month of the lunar calendar.
For soil preparation, mix decomposed cow manure and lime powder. Allow the soil to rest for 7 days before propagating the cuttings.
Prepare a glass and pour about 2 cm of clean water into it. It’s better to use well water or rainwater instead of tap water, as tap water contains chlorine, which can hinder root development.
Soak the cuttings in this water for 3 to 5 days until they sprout roots. Remember to place the cut end down in the water.
Step 1: Fill the foam box, pot, or garden bed with soil, depending on your conditions.
Step 2: Insert the rooted cuttings into the soil, which can be placed at an angle or vertically, as you prefer. Space each cutting about 20x20 cm apart.
Step 3: Keep them in a shaded area for the first 3 days and water them daily. After that, you can move them to a sunny spot.
When the katuk plants reach a height of 25 to 30 cm, you can start cutting branches to eat.
Care for katuk by lightly loosening the soil surface with a hoe or trowel. Sprinkle a mixture of compost and phosphorus on the soil surface. Cover it with straw or rice husks to retain moisture and prevent soil compaction.
When the plants are about 50 cm tall, harvest by cutting off the entire upper portion of the plant, leaving about 20 cm above the ground. Strip off all the old leaves and branches from the stem. Water with banana-infused liquid once a week.
By maintaining this care routine, you can enjoy katuk for many years without needing to replant.

Ý kiến bạn đọc
Những tin mới hơn
Những tin cũ hơn
 The most unique carrots in the world!
05.09.2024
 Guide to Propagating Basil Cuttings for Beginners
30.08.2024
 How to take care of basil plant indoors for Beginners
30.08.2024
 Interesting Facts About Ants
23.08.2024
 Coucal bird: Natural Enemy of Snakes
22.08.2024